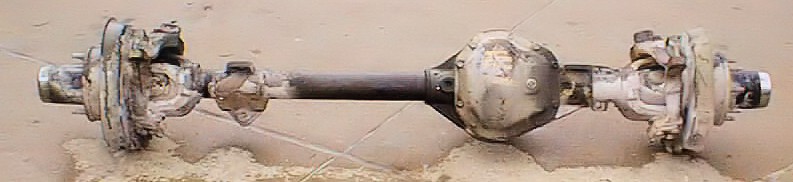
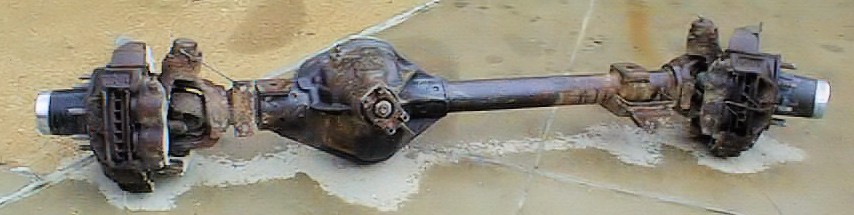
Dana 60 Solid Axle Swap
I understand why Ford chose equip it’s trucks with the Dana 50 ‘twin traction beam’ suspension. It’s supposed to improve ride quality and vehicle handling. For the heavy duty series, my personal opinion is that any truck over 8,500gvw should come equipped with a solid monobeam front axle. Therefore I knew at the outset that I was going to upgrade Project Responder from the uneven tire wearing IFS to a bullet proof Dana 60.
I was extremely fortunate to have a master transmission and axle mechanic in the metro area, James Schiele & Sons in Afton, MO. Jim Schiele is the same gentleman who supplied the transfer case. With Jim’s recommendation, I contacted a firm in northeastern Missouri, that had two dana 60 axles available. The axle was delivered directly to James’ shop to be completely rebuilt and restored including replacing all the seals and the ball joints.
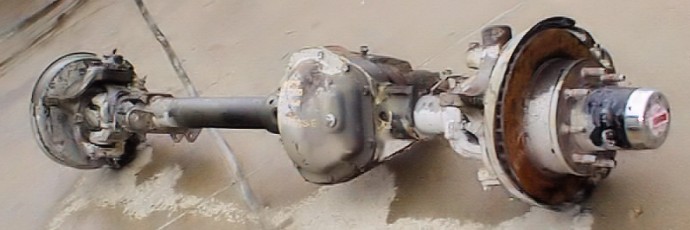
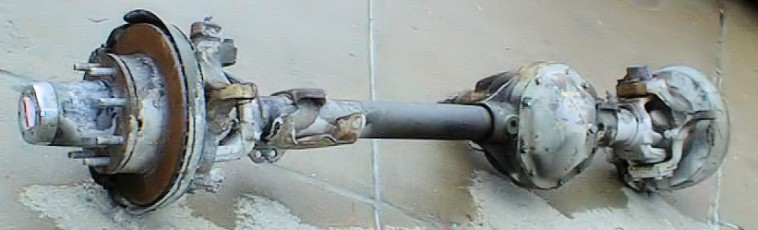
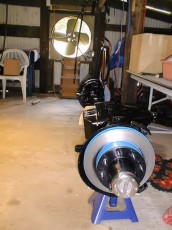
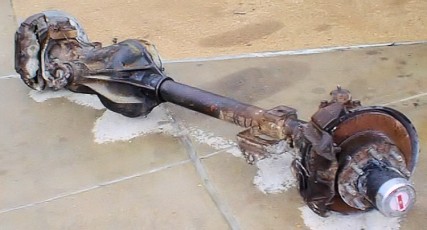
The axle was completely torn down by Jim Schiele. All of the internal parts were hot tanked and the axle housing along with the steering knuckles and stone shields were sent out for sandblasting. I took the hubs, rotors, axles and spindles to refinish at my shop.
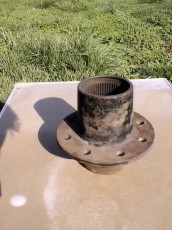
For the parts I brought back, I began with the axle shafts. These were taped off to protect the bearing surfaces and the splines. I then began blasting with silica sand. Once they were cleaned of all rust and scale, I hung them up and gave them a coat of primer. Then I turned our attention to the hubs. The rotors and studs were removed since all new parts were going to be installed. This made the hubs much easier to work with. There was nothing to tape since new bearings and races were going to be installed. So I opened the valve and let the sand fly. Once the hubs were completely rust free (inside and out), I set them aside and put a coat of primer on them as well.
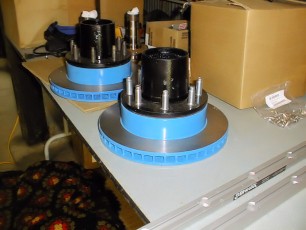
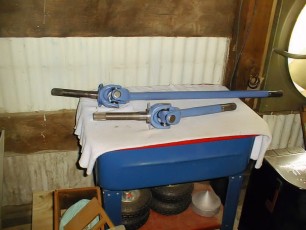
After the primer was dry (in about an hour) I began layering the first coat of enamel paint. I chose blue for the axles and U-joints and chose gloss black for the hubs. On the rotors, since they were brand new, I just de-greased them and layered them with couple coats of blue. After all, with all of the work I had done so far, and with so much invested, the last thing I want is to allow rust an easy home.
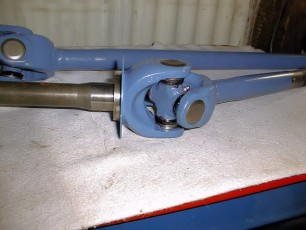
Now that the newly painted axles, hubs and rotors had dried, I had the studs and rotors pressed onto the hubs at a local parts house, Beier’s Automotive in Murphy Flats, as well as installing the agricultural grade U-joints. Once more, I broke out the spray paint. I degreased the u-joints and sprayed them blue. The hubs & rotors we touched up after the studs were pressed since there were a few small the nicks from the press.
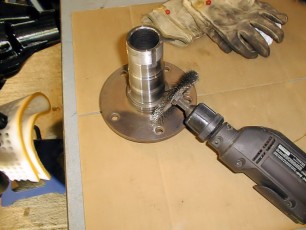
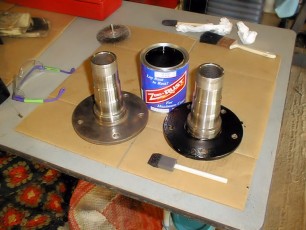
Lastly, I had to clean up the spindles since these could not easily be sandblasted. Using a stiff wire wheel brush, I cleaned all off the rust and scale. Fortunately, I was supplied by Zero Rust with a couple of cans of their black rust barrier coating. Once cleaned, the metal was coated with the Zero Rust and I was very pleased at how quickly it dried and how well it covered. Now all that was left was wait for the axle housing and other parts to be completed by the sandblaster.
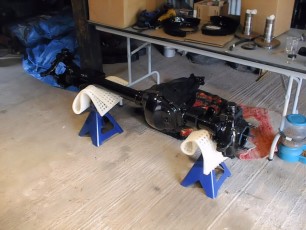
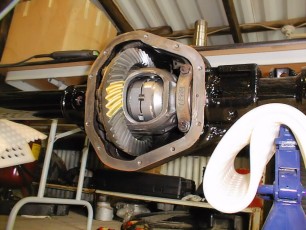
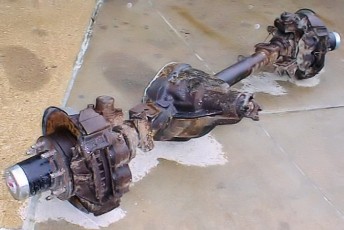
I had a local firm, Liberty Sandblasting & Specialty Coatings, do the blasting. The parts were taped off per Schiele’s specifications. Once blasted, they sprayed the parts with primer and then we took them back to Schiele to re-build the axle including the installation of the Powertrax Noslip unit. Once the axle was completed, it went back to Liberty for a final touch up of the primer and then a coat of SuperThane which is one of the most durable paints around. The final assembly was done in house.
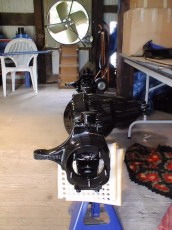
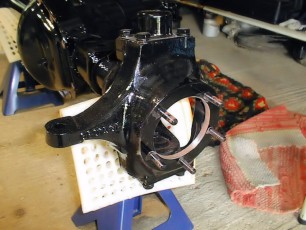
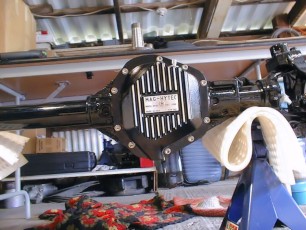
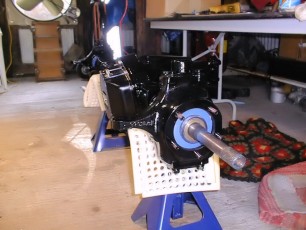
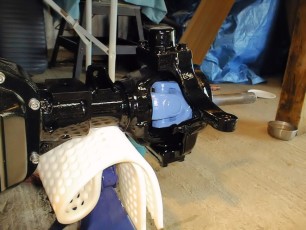
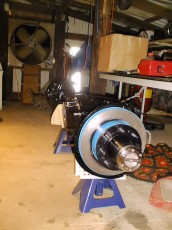
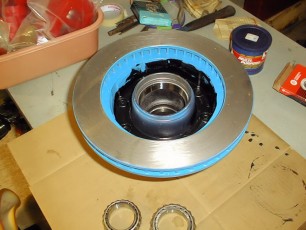
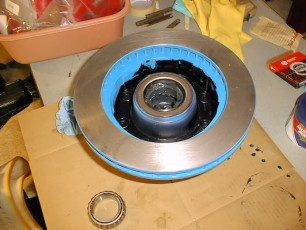
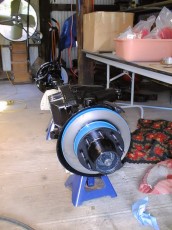
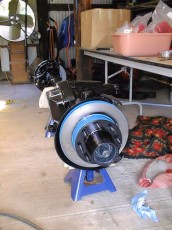
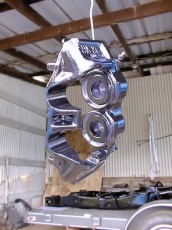
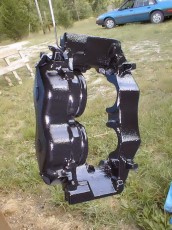
Once I had everything back in my shop, I began the process of assembling the axle. I began by removing the original differential cover so I could install the new Mag-Hytec differential cover and touch up the black urethane paint. Next, I installed the painted axle shafts after covering them with a coat of wheel bearing grease for ease of installation and basic protection. Once the axles were in place, I found that the superthane coating was much too thick to allow the steering knuckles, stone shield and spindles to seat properly. This would leave too much play against the “v” seal. Therefore, I used a Dremel tool with a grinding wheel to remove all of the coating material around the metal where the parts would meet. Once the metal was bare, I dressed them with a light coat of Zero Rust to insure a rust free axle for many miles to come. After they dried, the spindles were secured to the steering knuckles, sandwiching the brake caliper mounts and stone shields between them.
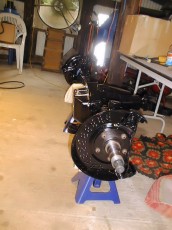
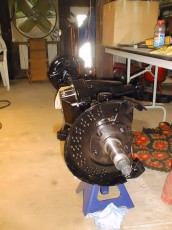
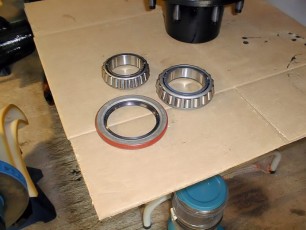
From here, the the bearings were packed with moly grease and installed in the hubs. Once in place, I packed extra grease in and around them. To keep water and foreign matter out, I installed new inner seals by tapping them into the back of the hubs. The hubs were then slid onto the spindles. Lastly, I packed the front bearings and put them in. To keep the hubs in place, I installed the wheel bearing nuts and lock washers and tightened them to Ford’s specifications.
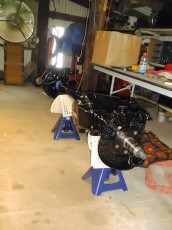
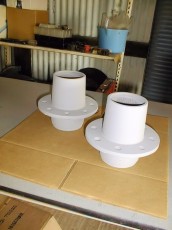
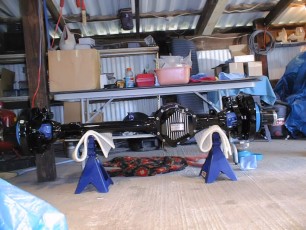
To complete the rebuild, we installed a new set of Stainless Steel Milemarker lockout hubs to replace the worn out factory hubs. All that was left was to add oil which I did once the axle was set under the frame.