Installing a Holley In Tank Fuel Pump
Holley Performance was one of the original sponsors and they were generous enough to continue supporting this project with their in tank low pressure fuel pump. Here, I’m going to go over the installation of the fuel pump in the Transfer Flow fuel tank. To begin with, the kit comes with everything you need for the installation. The kit includes the pump, pump hanger, clamps, seals and the HydraMat fuel pick up material. I had to do some research on the HydraMat to understand what it is and what it does. It is actually quite amazing. This video is great at explaining how it works. Holley has always been cutting edge, but this is outstanding.
The first thing to do was remove the fuel tank and the fuel tank sender unit. I had done so several weeks prior to ensure any remaining fuel and/or fuel vapor would be eliminated when it came time to start the job. The only problem here is that the sender was built into the fuel pickup assembly from Transfer Flow. Because the tank is baffled, options were limited in its relocation. I opted to mount it next to the opening but it had swing up at a slight angle to ensure the baffle wall would not interfere. Mission accomplished.
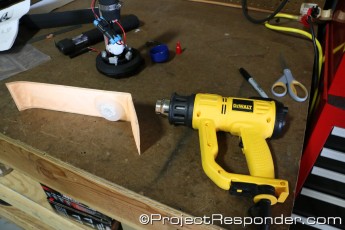
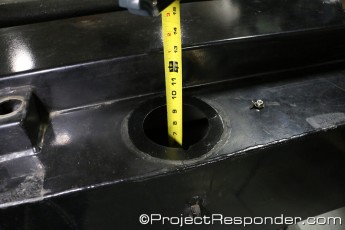
Now for the new unit from Holley, on the bench, I measured the inside height of the tank in order to determine the length to which the fuel pump hanger assembly should be. Once that was calculated, it was cut and the fuel pump mounted to the body of the main unit. That was the easy part. The hard part was yet to come. The HydraMat that is included with the pump is probably designed for most typical factory fuel tanks with the opening somewhere near the center of the tank. The opening in the Transfer Flow replacement tank is right at the front of the tank. This is because the tank is designed with the bottom sloping towards the front so that on level ground, it is the deepest part of the tank. For this job, it posed a big problem. Believing I already knew the answer, I called Holley tech support to find out if cutting the HydraMat would be acceptable and the answer was a resounding “no”. Just as I had suspected, cutting the HydraMat material causes a failure of the inherent capillary action with which the material is able to pull the fuel to the pump as long as any part of it is in contact with the liquid. Fortunately the HydraMat has a somewhat rigid plastic inner core and it was this core that I intended to re-orient. Using a heat gun on a medium setting of 300 degrees, I slowly heated the material until I was able to create a 90 degree bend in the material such that it would fit the shape of the tank. Problem solved, on to the next step.
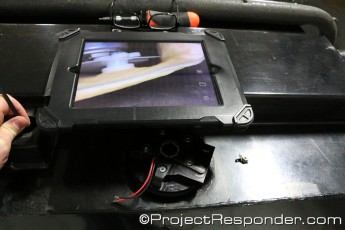
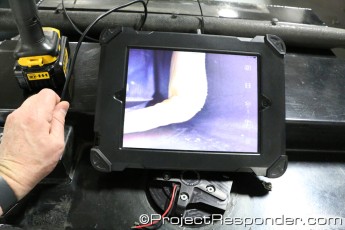
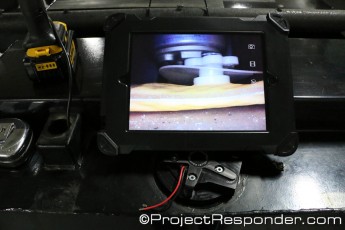
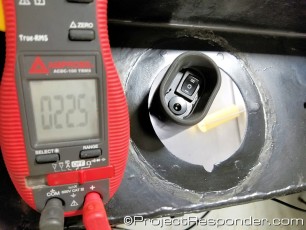
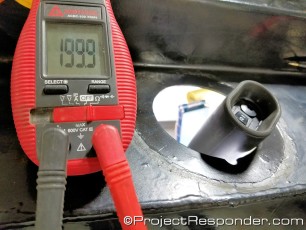
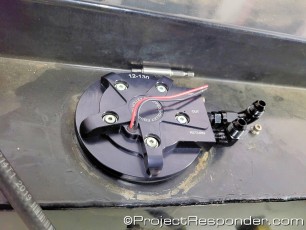
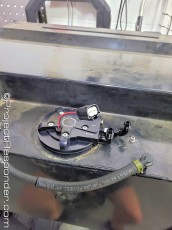

To ensure the fuel pick up is as effective as possible, I had to ensure the mat was as close to the bottom of the tank as possible. Having it touch the surface without bottoming out was the goal. Using a endoscopic wifi camera from Depstech I was able to view the placement with the pump assembly in place. It was almost as if it were designed specifically for this application. The mat lined up perfectly and the pump housing was tightened down with the five internal swing out tabs to secure the unit in place. The vent opening was capped as the tank uses the factory pcv style vent assembly which is connected to an external charcoal filter.
The installation is now complete. All that remains is to re-install the tank and connect the fuel line, sending unit lead and to ground the tank to the truck. After that, it was on to the Sniper EFI and getting it installed on the motor and making all of the necessary connections.